I sewed these little stuffed birds (you can get the pattern from Spool) when I was pregnant with my second born. Here they are sitting on a bit of driftwood suspended above her cot. My son asked me to make extras and he plays with them all the time.


I sewed these little stuffed birds (you can get the pattern from Spool) when I was pregnant with my second born. Here they are sitting on a bit of driftwood suspended above her cot. My son asked me to make extras and he plays with them all the time.
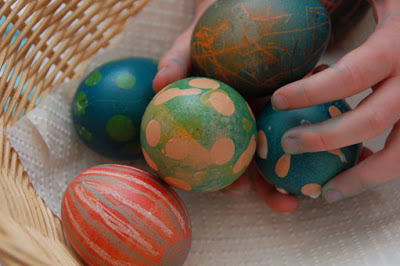
 Easter craft with E. We drew on hard boiled eggs with crayons, mum and I dripped candle wax on some and we dyed them different colours with food colouring. I was reliving fond memories of my childhood. Easter is my favourite holiday.
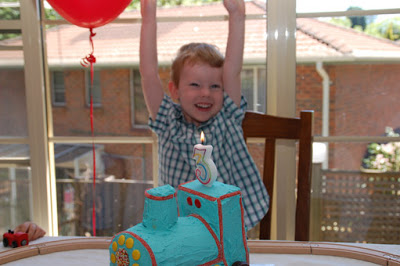
E's third birthday was last Sunday. We had a train party because trains are his current obsession. I had so much fun organizing this party, I think there is a frustrated party planner in me... what with the Wedding and High tea I planned last year for my sister. We did pass the parcel and some train craft activity. The train cake was the first cake I had made on my own. My mum made the cupcakes last year and for his first birthday mum helped me make the aeroplane cake.
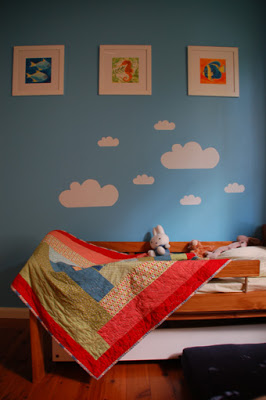
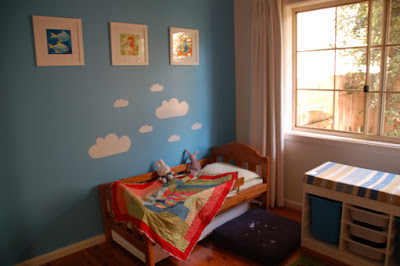
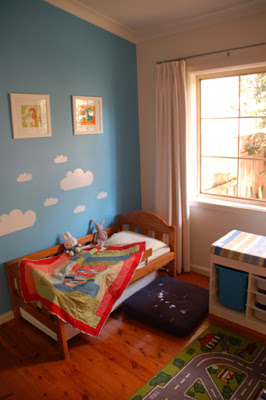
This is the bedroom for our firstborn which we decorated this year. It will always be a work in progress as he grows up, but for now it is mostly finished. Blue paint colour is from Nippon paint, Cloud decals from
($7),
painted by me,
made by me, striped cushion cover made by my Mum, floor cushion from Freedom furniture, Trofast storage from Ikea, Miffy toy bought by Steve in Japan, Bunny was a gift from my sister, bed is a cutdown cot - Steve made the side rail.
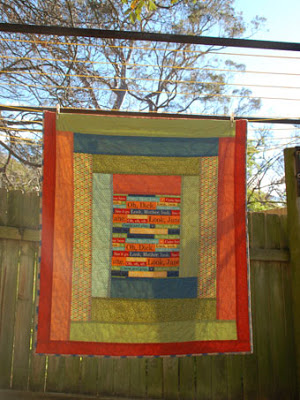


 I'm pretty chuffed with the binding fabric that I chose to finish it off. It ties all the fabrics together with the blue, yellow and red.
 I'm making a flock of birds right now. The tulips were from my Mr, aren't they perdy? That bird feels right at home.
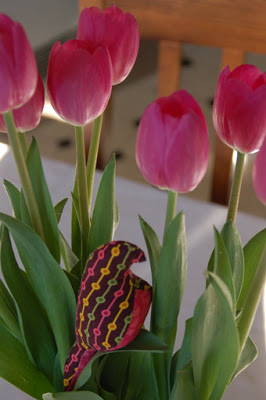

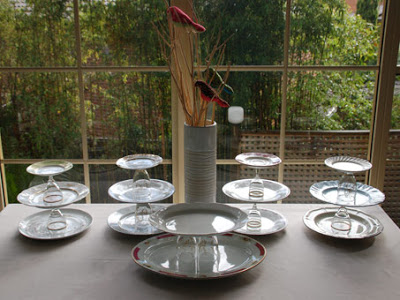
Last weekend I hosted a high tea celebration for my sister who is getting married this weekend. Actually it was more of a brunch because more sparkling wine was consumed than tea. The frustrated stylist in me had so much fun putting this table together! I was road testing the cake stands that we had made for the wedding cupcakes. They are made using thrifted plates and glasses. The homemade flavoured marshmallows are from a local Patisserie called
The birds I am currently making for a mobile which will go in the nursery. The bird pattern is from
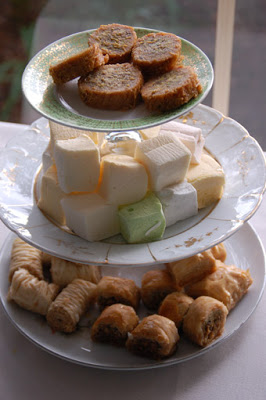
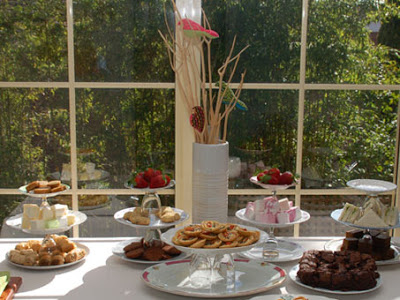
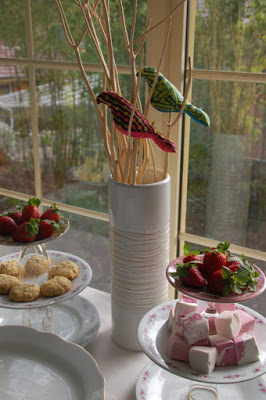
I didn't get photos of the food, but you get the idea. We had Strawberries, Baklava, marshmallows, Orange and Cranberry Oat cookies, Golden syrup slice (vegan), mini quiches, cucumber sandwiches (some with avocado, swiss cheese or salmon), cherry cheese cake, cranberry brownies and chilli chocolate muffins.
Visit more Creative Spaces over
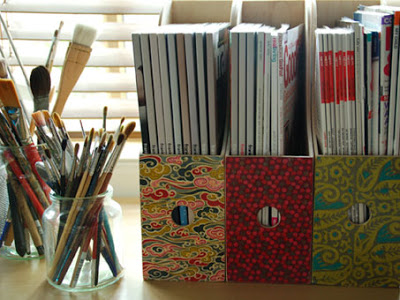 This is how to cover a magazine file...
 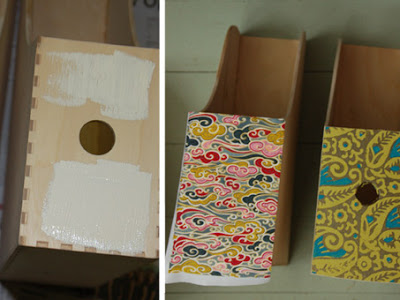 3. When the paint is dry, put a coat of Mod Podge glue over the top. Quickly paint a coat of glue on the back of your paper and stick to the still wet front of your magazine file.
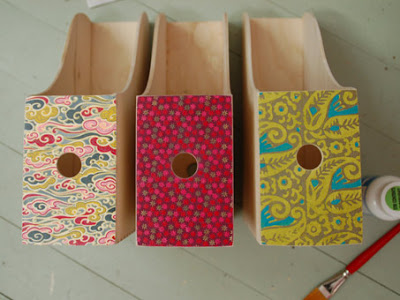 Next I might cover some storage drawers...
 The nieces loved the cushions. You may remember the cushion at the back from the Umbrella Prints trimmings competition. The one in front I made more recently.
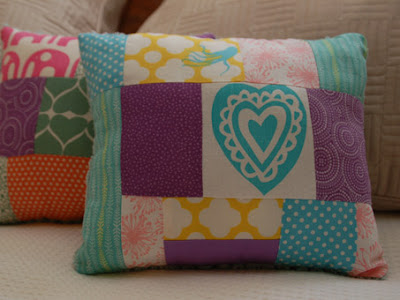
 E in a t-shirt that I decorated with a cute print of ants and flowers. He's been sick this week with a sore throat and he has produced more snot than ever before! I've been chasing him around with tissues for days.
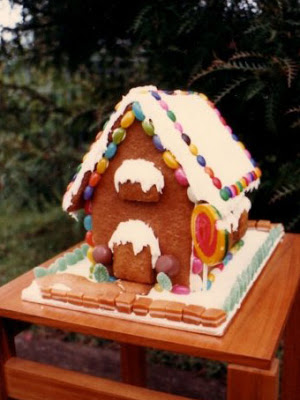 I am so happy that we have room for a Christmas tree this year! I am also super excited about making a Gingerbread house like this one my Mum made one year.